


This example demonstrates a full "node to cloud" data monitoring solution using the E20 Gateway and SNAP nodes using the following products:
The application server for these examples uses the SNAP Connect Python library to communicate over a SNAP bridge device to the wireless sensor nodes, and the Tornado Python library to communicate with a remote API. Both the SNAP Connect Python library and the Tornado Python library are high-performance asynchronous services, and they work really well together.
These setup steps are common to all of the examples included here, regardless of the cloud service used.
NOTE: If you've run the "Gateway-Hosted Web Server" demo, some of these steps are already complete.
Connect the SN132 to your PC by plugging it into any available USB port.
If you have not already done so, download and install the Synapse Portal IDE.
The Synapse Portal IDE provides complete embedded module development tools, as well as wireless sniffer capability. The latest version is always available from:
https://forums.synapse-wireless.com/showthread.php?t=9
Copy the contents of this project's snappyImages directory to your Portal/snappyImages directory. Apply power to the SN171s.
Now you can connect Portal to the SN132 as a bridge node and upload the demo_sn171.py script into the SN171s.
Please make a note of the SNAP Addresses of the two SN171 nodes - you will need this information later.
The E20 runs Ubuntu 14.04, which comes with Python 2.7.6 by default. Python 2.7.9 or later is required for interacting with AWS IoT and Exosite, so we need to build it for the E20. If you do not already have Python 2.7.9 installed, clone this project onto the E20 and run sudo ./install-python2.7.9.sh to build and install it.
Once the basic setup above is finished, you can follow the instructions below to interface with the listed cloud service:
To use this example a free Adafruit IO account is required. To sign up, visit:
https://accounts.adafruit.com/users/sign_up
After signing up, go to your Adafruit IO settings page and get your AIO API key:

Simply power up the E20 and load the software onto the E20 (put it in the snap user directory). You must edit the provided adafruitio/settings.py file to use your personal AIO key:
# TODO - Update ADAFRUIT_IO_KEY with your personal Adafruit IO API key
ADAFRUIT_IO_KEY = "ab37939a9873db7e9f97b97a7ed99cb98d98e98baf98be98ad"
This example also uses several 3rd-party Python libraries. Install them onto your E20 using
sudo pip2.7.9 install -r adafruitio/requirements.txt --extra-index-url https://update.synapse-wireless.com/pypi/
Once both of these steps have been competed, execute the adafruit_example.py Python script as sudo.
sudo python2.7.9 adafruit_example.py
Now that Adafruit IO and the E20 have been configured, the Feeds page should new values that were transmitted by the SNAP node.
Now take some time to explore Adafruit IO by creating your own dashboards.
To use this example, an AWS developer account is required, and your account must have full AWS IoT privileges. To sign up, visit:
http://docs.aws.amazon.com/cli/latest/userguide/cli-chap-getting-set-up.html#cli-signup
You must install and authenticate with AWS CLI; this is a Python package that is installed when you install the Python requirements file.
NOTE: You must be using Python 2.7.9+ in order to use this example.
Simply power up the E20 and load the software onto the E20 (put it in the snap user directory).
This example also uses several 3rd-party Python libraries. Install them onto your E20 using
sudo pip2.7.9 install -r aws_iot/requirements.txt --extra-index-url https://update.synapse-wireless.com/pypi/
To authenticate your user with AWS, type /usr/local/lib/python2.7.9/bin/aws configure and specify your AWS Access Key ID, AWS Secret Access Key, and region. For more information, see Configuring the AWS Command Line Interface.
Update the THINGS variable in aws_iot/settings.py file to specify your device IDs (these need be the SNAP addresses of your SN171 boards). Once you have updated this file, run python2.7.9 setup_aws.py from the aws_iot directory to create your devices, policy, and certificate.
Run the AWS example using the following command:
sudo python2.7.9 aws_iot_example.py
To use this example, a free Exosite Portal is required. To sign up, visit:
https://portals.exosite.com/signup?plan=2692704445
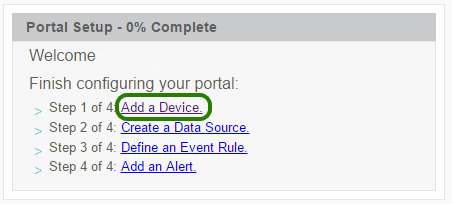
From the welcome screen choose Add a Device:
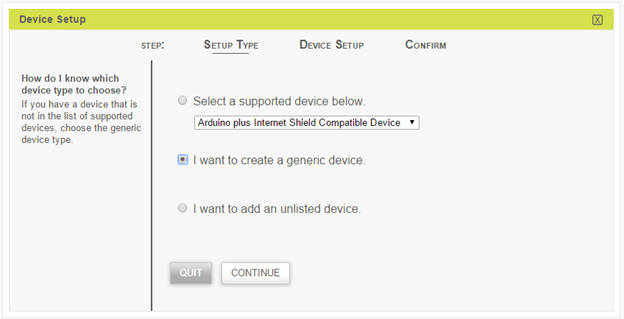
In the dialog that appears, choose "I want to create a generic device":
On the next step, "Device Setup", please fill any details that you want. In the final step it will ask for a name, which can be anything (such as "SN171"). Once the setup has completed, it should list your device in the devices table:
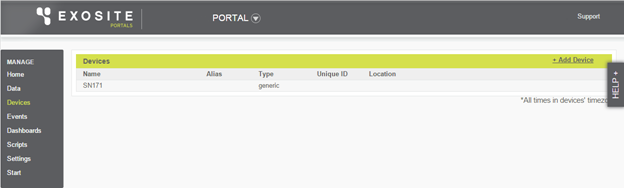
Click the newly added SN171 device and its details should be displayed:

In the "Alias" text box, fill in the SNAP address of the module that is installed in the first SN171 board.
NOTE: To be compatible with the example code, the addresses should be entered without any separators (no "." Or ":", etc.) plus the hexadecimal digits a-f must be entered in lower case.
Where the CIK value is displayed, copy this somewhere for later pasting into the CIK dictionary in exosite_connector.py.
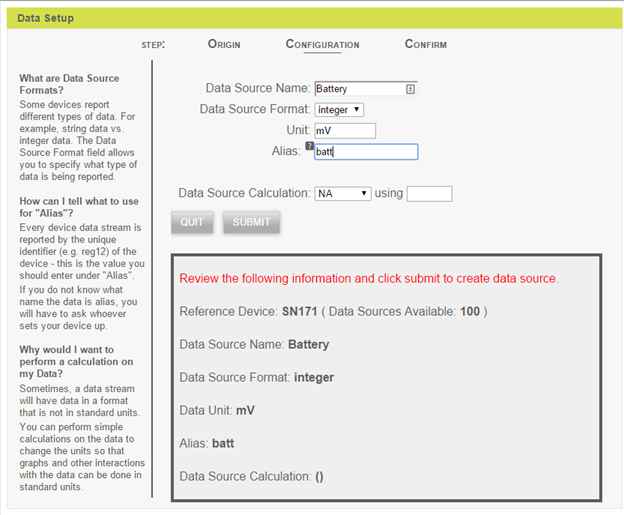
Next choose "Add Data" to define the information the SNAP node will be sending. In the "Data Setup" dialog that is displayed, fill in the values:
"Data Source Name" = "Battery"
"Data Source Format" = "integer"
"Unit" = "mV"
"Alias" = batt
The dialog should now look like this:
Submit this form and add two more data sources:
"Data Source Name" = "Button Count"
"Data Source Format" = "integer"
"Unit" = "presses"
"Alias" = count
"Data Source Name" = "Button State"
"Data Source Format" = "integer"
"Unit" = ""
"Alias" = state
Simply power up the E20 and load the software onto the E20 (put it in the snap user directory). You must edit the provided exosite_connector.py file to change the EXOSITE_CIKS dictionary to match your SN171 MAC addresses and Exosite CIKs. Find the following code snippet and update it:
# TODO: Replace these with values from your own Exosite account and resource
# We want to map SN171 SNAP addresses to Exosite CIKs
EXOSITE_CIKS = {"XXXXXX": 'unique Exosite CIK here',
"YYYYYY": 'another unique Exosite CIK here'}
This example also uses several 3rd-part Python libraries. Install them onto your E20 using
sudo pip2.7.9 install -r exosite/requirements.txt --extra-index-url https://update.synapse-wireless.com/pypi/
Once both of these steps have been competed, execute the exosite_example.py Python script as sudo.
sudo python2.7.9 exosite_example.py
Now that Exosite and the E20 have been configured, refreshing the "Device Information" on the Exosite website should show new values that were transmitted by the SNAP node.
Repeat the same process of adding a device and data sources for the other SN171.
Now take some time to explore Exosite's Portals website by creating your own dashboards.
To use this example, a free Initial State login is required. To sign up, visit:
https://www.initialstate.com/app#/register
From the welcome screen choose Create HTTPS Bucket:

In the form that appears you can choose any name that you wish for the bucket. A possibility would be to use the node's SNAP address.
Once the bucket has been created you will need to find your Bucket and Access keys. To access these keys, click on the settings link:

You should see a panel like this:
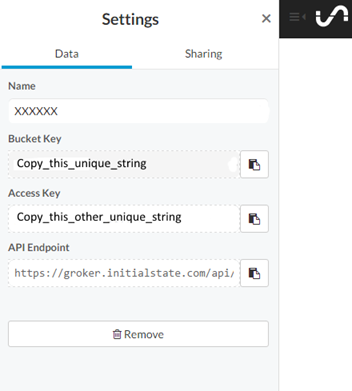
Copy the "Bucket Key" and "Access Key" somewhere for later pasting into initialstate_connector.py.
Simply power up the E20 and load the software onto the E20 (put it in the snap user directory). You must edit the provided initialstate_connector.py file to change the INITIAL_STATE_BUCKETS dictionary to match your SN171 MAC addresses and Initial State keys. Find the following code snippet and update it:
# TODO: Replace these with values from your own Initial State account and buckets
# We want to map Initial State buckets to nodes
INITIAL_STATE_BUCKETS = {
"XXXXXX": "unique Initial State bucket key here",
"YYYYYY": "another unique Initial State bucket key here"
}
ACCESS_KEY = "your unique access key here"
This example also uses several 3rd-part Python libraries. Install them onto your E20 using
sudo pip2.7.9 install -r initialstate/requirements.txt --extra-index-url https://update.synapse-wireless.com/pypi/
Once both of these steps have been competed, execute the initialstate_example.py Python script as sudo.
sudo python2.7.9 initialstate_example.py
Now that Initial State and the E20 have been configured, the Initial State website should show new values that were transmitted by the SNAP node. Repeat the same process of adding a device and data sources for the other SN171.
Now take some time to explore Initial State's website by viewing data sent from your SN171s.